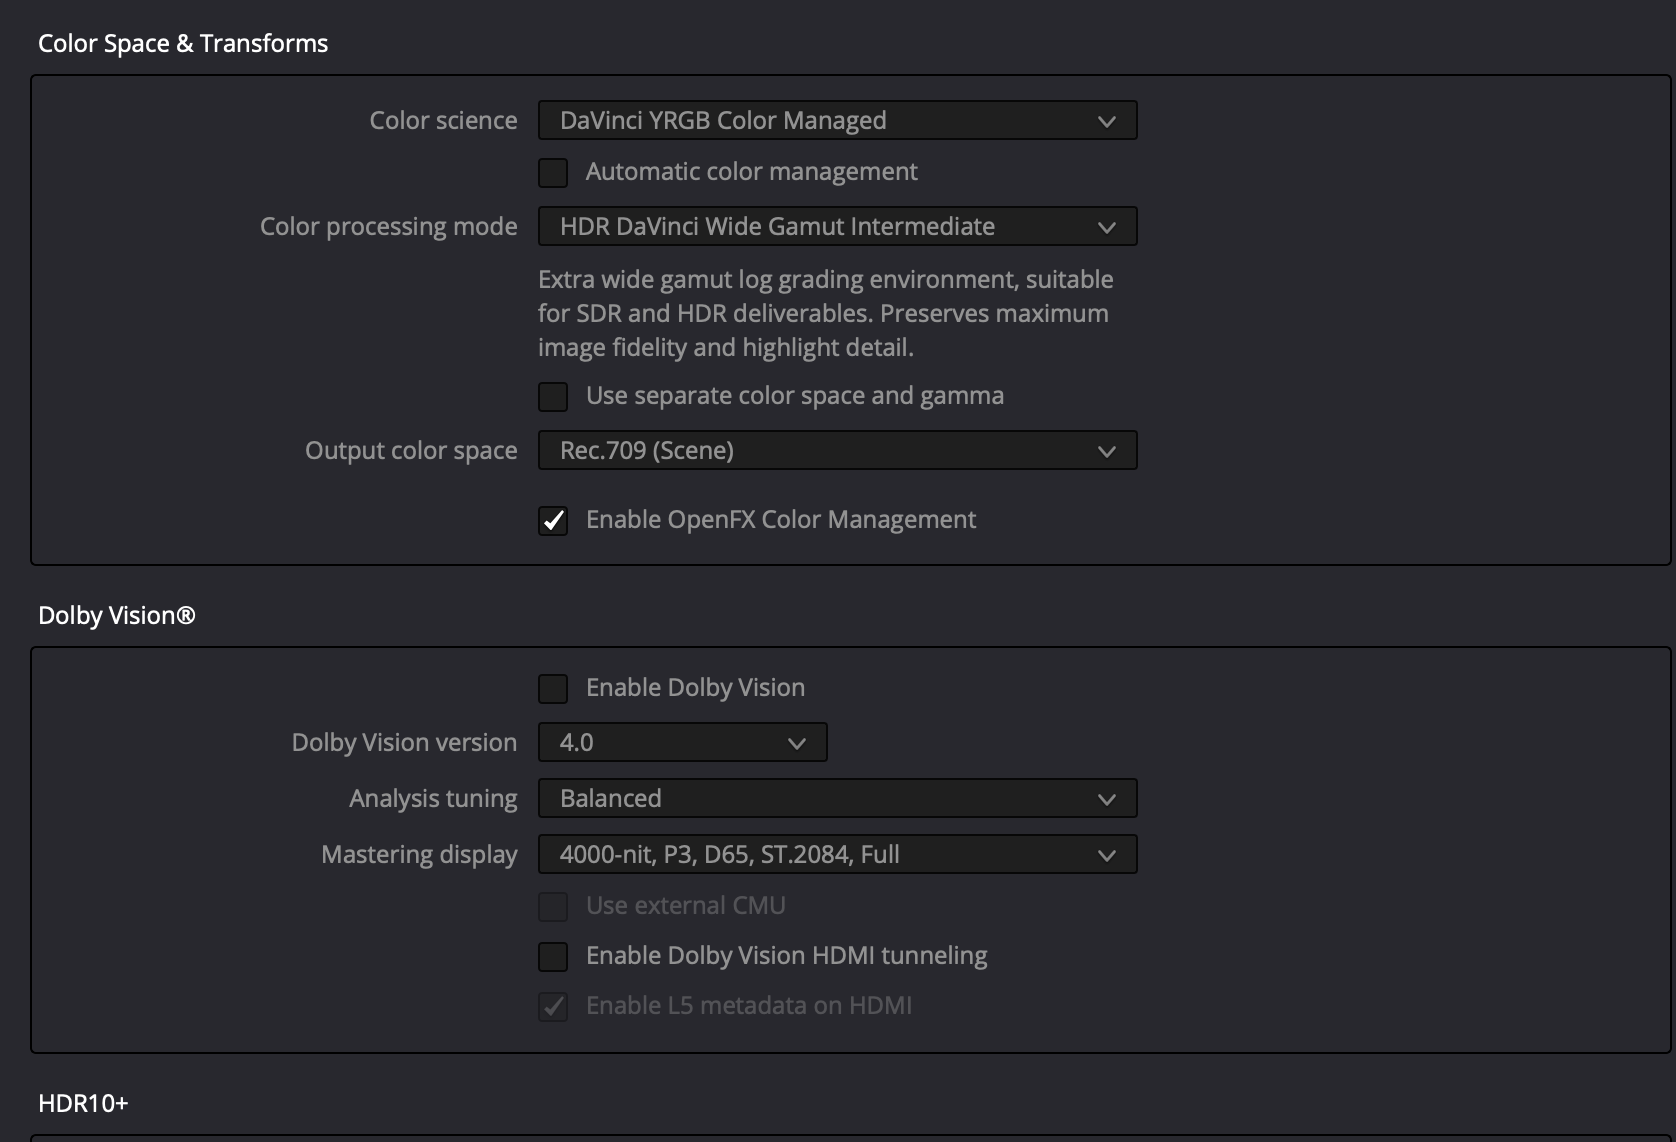
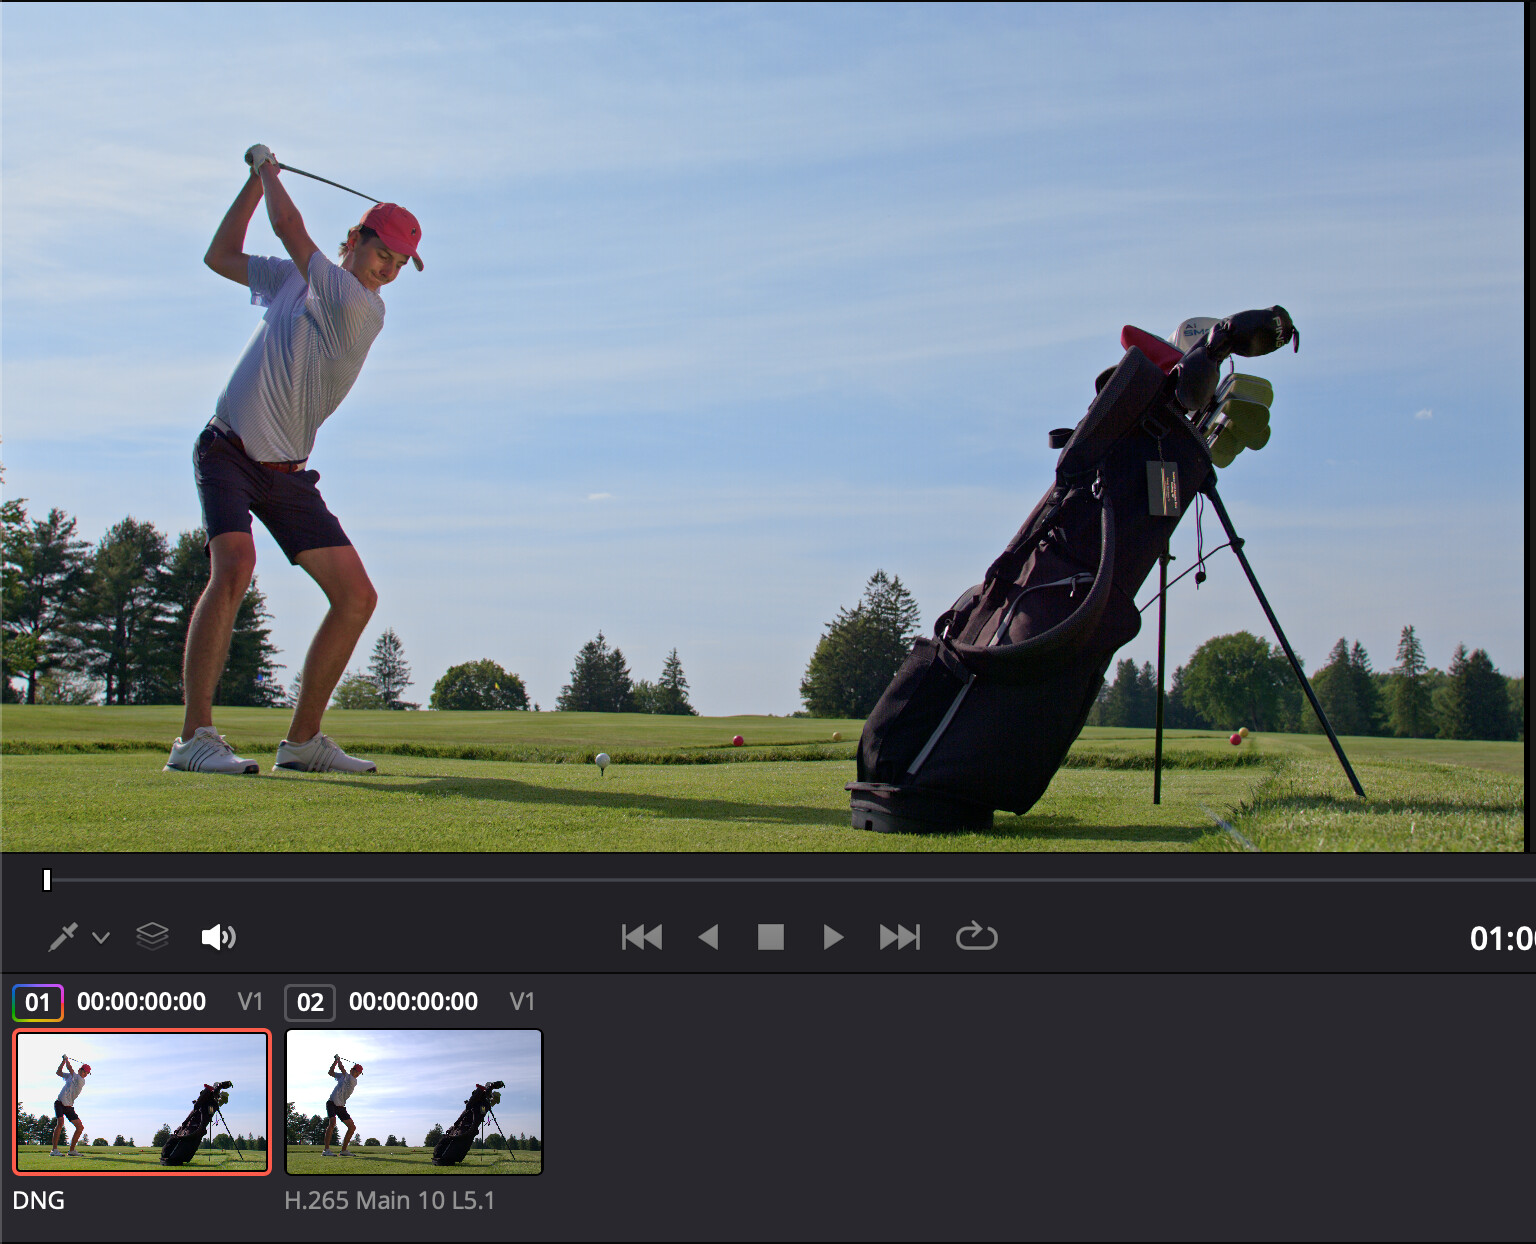
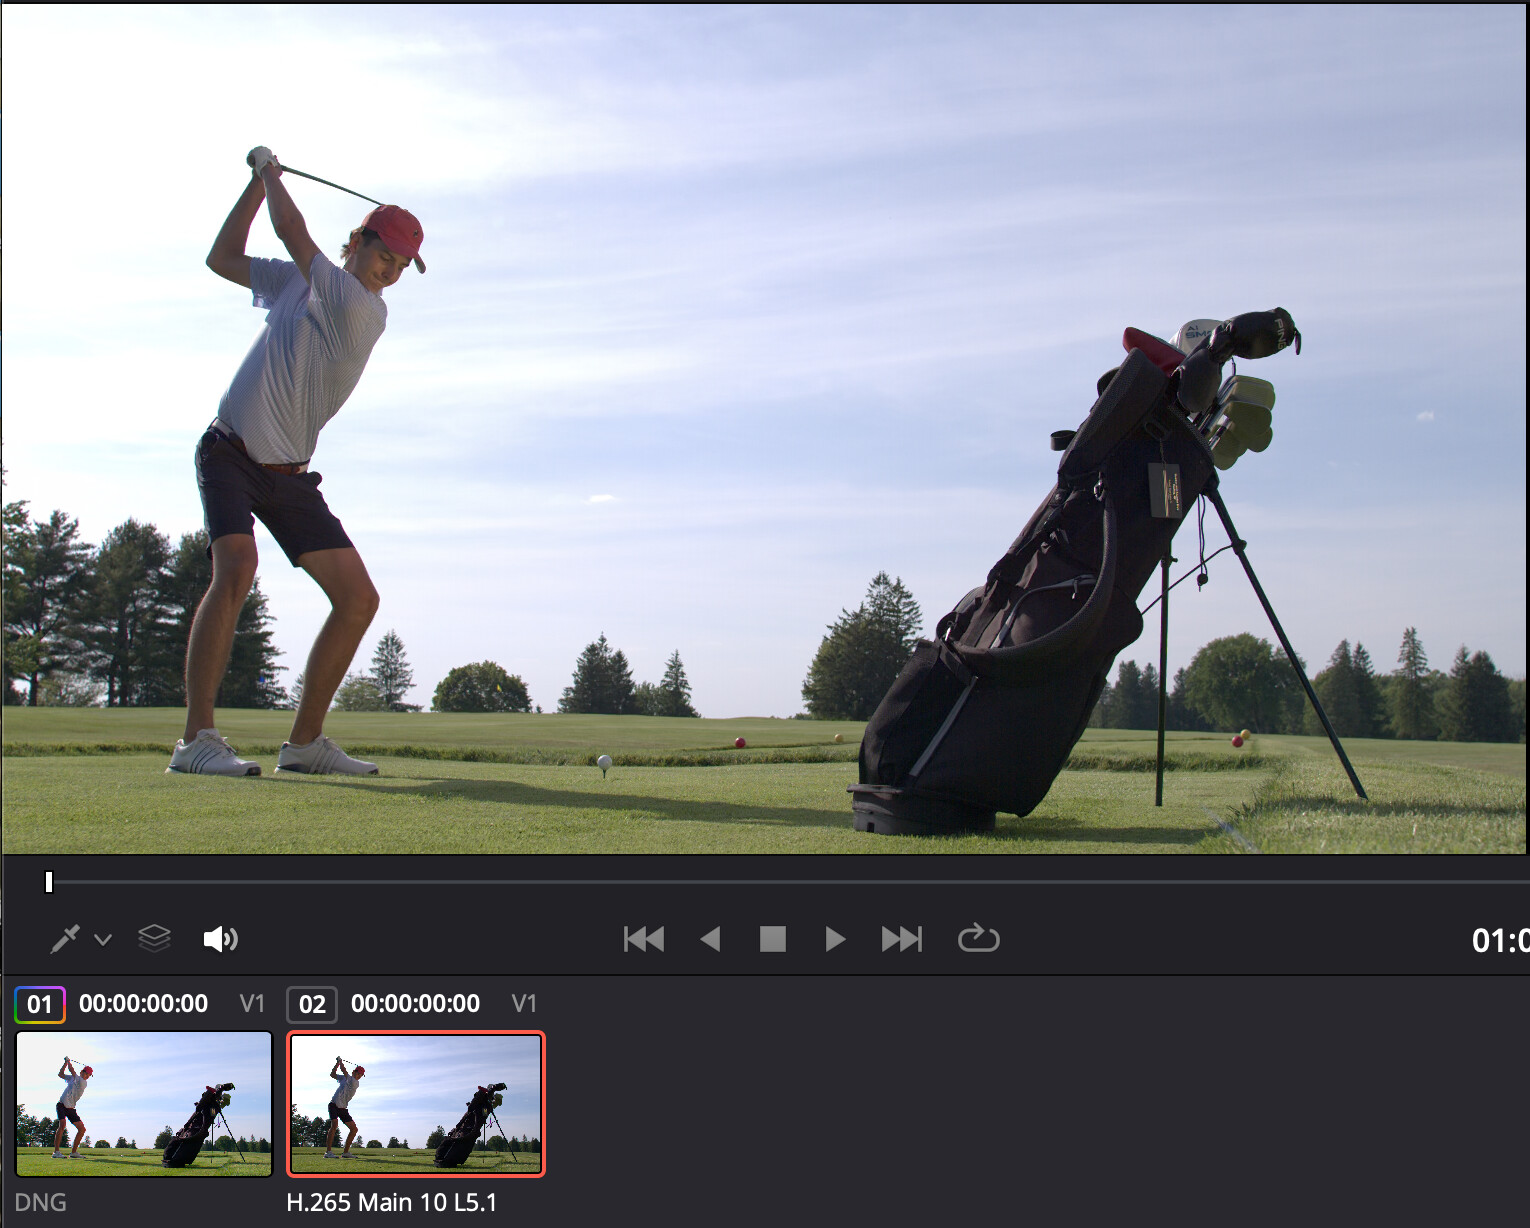
I am by no means a colorist lol… I have just been playing around with my Spark footage and trying to understand how best to expose it and what is recoverable and what is not… I have found that Davinci understands the imported DNG’s much better when I setup my project like this, otherwise when I import the DNG’s the exposure Is pretty off and it needs a lot more correction out of the gate.
1 Like
Try running it as LOG. I’ve been using the following:
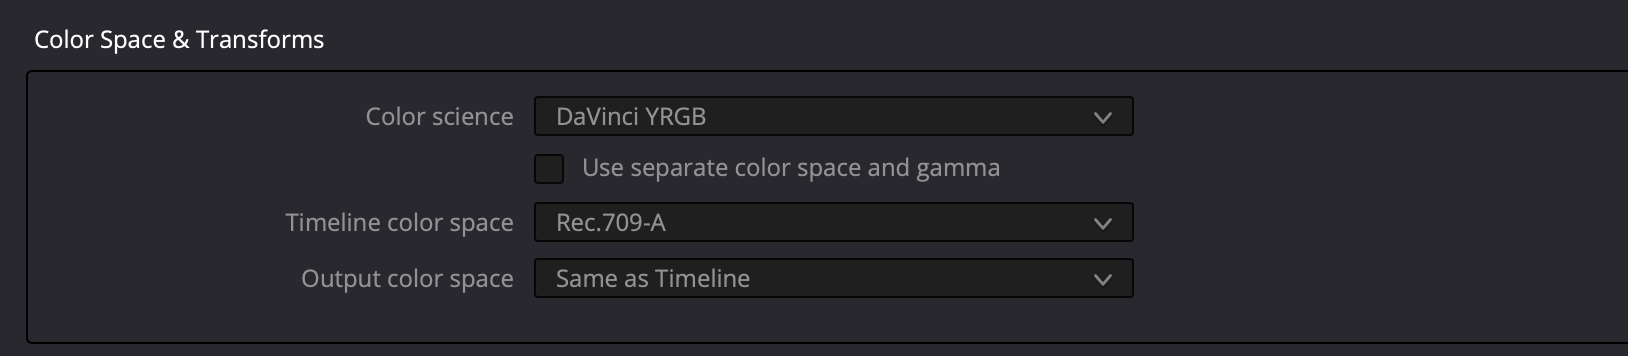

For the Color Space Transform on Node 1, I’ve been playing with different settings. This has been getting a solid base. You could also obviously output to Slog3 or even Log3G10. Use a adjustment LUT for Node 2 and then your favorite creative LUT (709 based) on Node 3.
Hope this helps!
2 Likes
OK, I will give that a try today… My colorist buddy, had mentioned letting Resolve do the conversion in the background vs a CST since the color manager has a few advantages however, I do like that your way allows you to adjust a few flavoring tactics.
I will give it a try and see what happens. Until the official resolve workflow happens its all gonna be just us trying to find the easiest most natural way to shot match to other cameras lol.
Tomorrow I am on a commercial where we are matching to Canon R5’s LOLOL… I would much rather be shooting on my Raptor and match that.
Don’t have my Pixboom yet.
But at least with sony S-LOG I don’t like Davinci Managed Color Space (even tho it can work great).
Instead the following gives me extremely easy workflow that I’ve been using for past 5 years:
Node 1: exposure / WB balance in log
Node 2: CST from camera log to Rec.709 or DWG/Intermediate
Node 3+: creative grade
Node Last: CST Intermediate to output Rec.709
That means you are adjusting the log image before the display transform, so you can place the image into the transform properly. If the exposure is too high or low before the CST, the transform may push contrast, saturation, highlight rolloff, and skin tone placement in a way that feels harder to correct afterward.
For most of the cases the only sliders I touch is Exposure (Offset) and WB in Node 1. Works like magic.
For different cameras I just replace Node 2.
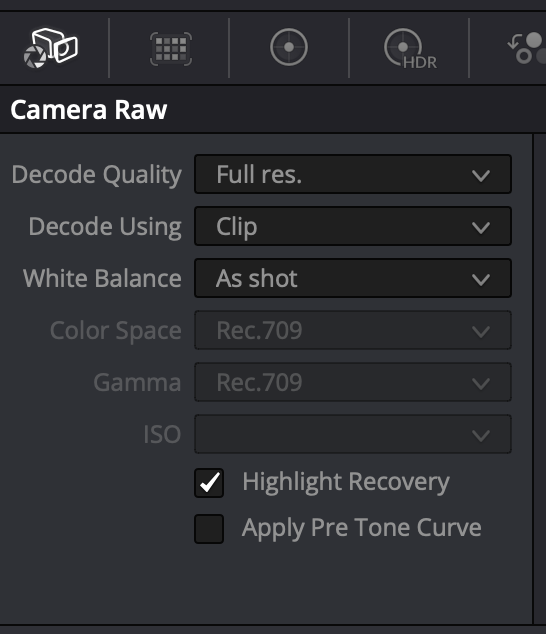
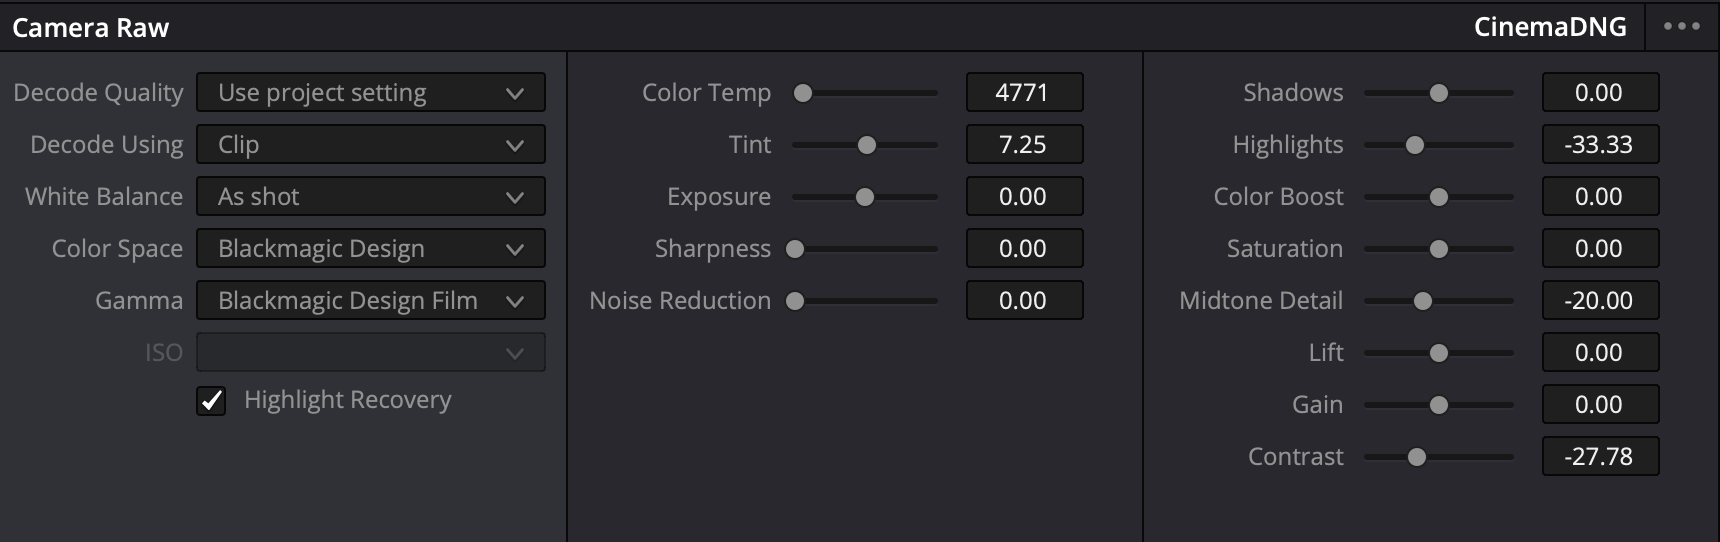
For Pixboom it might be what @BKA88 suggested - Instead of Node 1 you adjust Camera Raw settings
I have tried BKA88’s method and indeed, I believe this is the more flexible way to get a good base… My way is the lazy way and gets you 90% there with good starting color. However I think for shot matching we all do want more of a neutral start like what BKA88 is showing here…
Nice work, I cant wait till there is a native workflow tho lol …
Davinci also has “Shot Match to this clip” - in many cases it works surprisingly well as final automagic match node ![]()
thanks for sharing this, starting to dig more into the best color workflows and pipelines with my unit and will try this out this weekend.